Hello Developer, If you are reading this then you are on the right path to set up your first-ever cloud VM.
Let us begin the journey toward cloud!
What is DigitalOcean?
DigitalOcean is a cloud infrastructure provider that offers cloud services to help developers deploy, manage, and scale applications. They provide virtual servers, storage, databases, networking features, and other cloud-based services. They offer Pay As You Go model which are affordable and also at par with the quality delivered. Let’s begin our journey with DigitalOcean
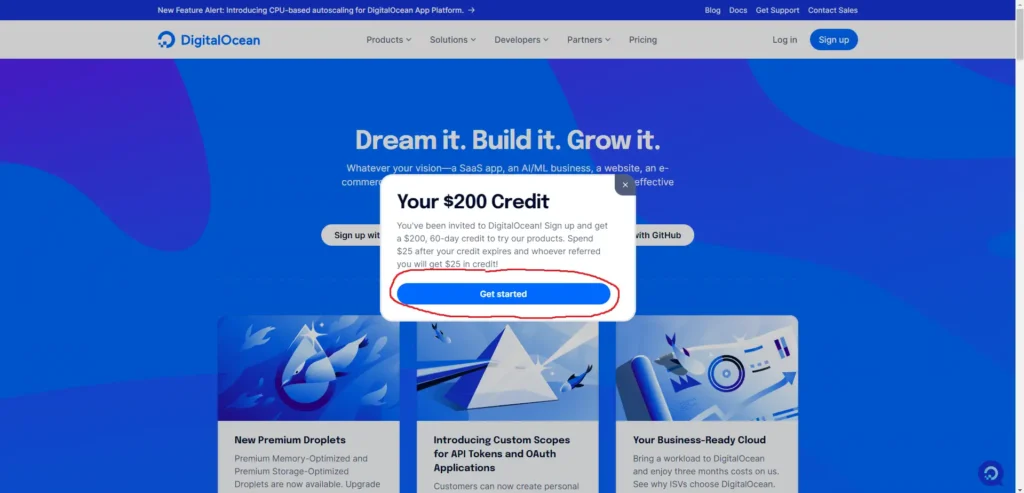
First we head to DigitalOcean to create a new account for us. You may use my referral link in order to get $200 for 60 days by clicking here.
After clicking the link above select Get Started. You will be redirected to sign up page automatically.
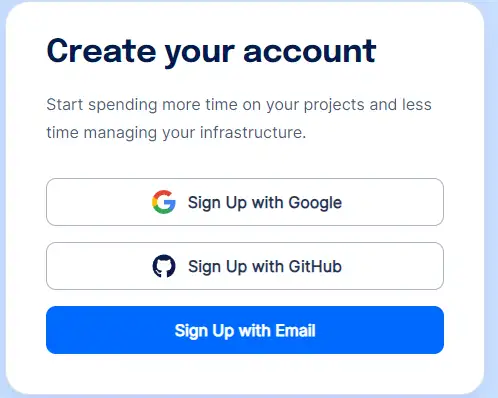
After clicking on Get started, The page will show you three options to sign up. You can choose your preferred method and sign up for the service.
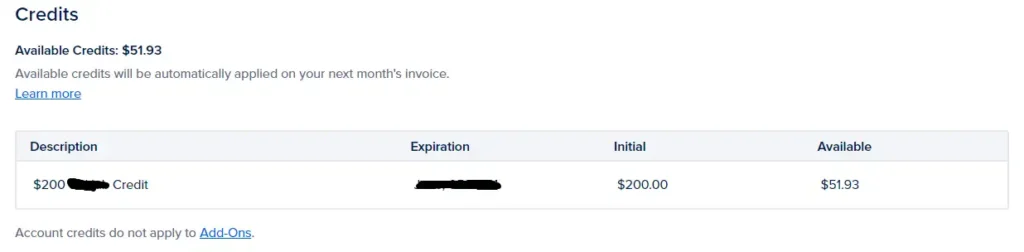
After signing up It will ask you to attach a payment method. After successful payment verification you can see that the credits have arrived in your account by visiting https://cloud.digitalocean.com/account/billing . Scroll down upto the credits section and it will show you the credit amount. Image in reference in below.
Now that you have created an account on DigitalOcean. We will go spin up a Droplet (VM in digitalocean notation). Before we do so, We also encourage security in mind and we will go ahead first by creating SSH Keys.
What Are SSH Keys ?
This is a beginner blog so we will be explaining it in a fresh way. SSH Keys contain two parts, first is a public key and second is a private key. In terms of reference you can consider public key as your home door lock which can be seen by public all around but in order to open the door you need your key which is private key in this reference.
When your Cloud VM is created, you need to access it somehow. A connection needs to be established for you to have access to the Cloud VM terminal. SSH key encrypts this connection between you and your cloud VM.
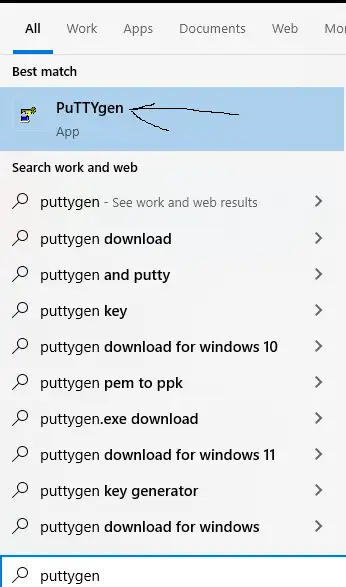
In order to create SSH keys for this blog we will be using PuttyGen. You can download it from here
After downloading open start menu and type Puttygen
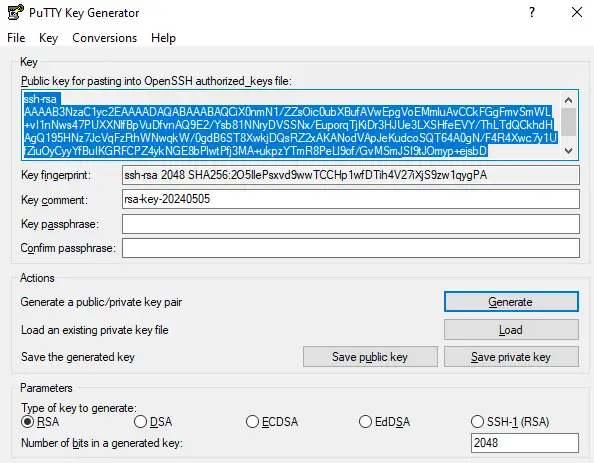
Upon opening the application just Move your mouse randomly in the application blank area. Now you should see the contents of your generated key in such a manner.
Adding SSH Key to your DigitalOcean account.
Keep your puttygen application open, do not close it. Open your Digitalocean Page and click create > Droplets.

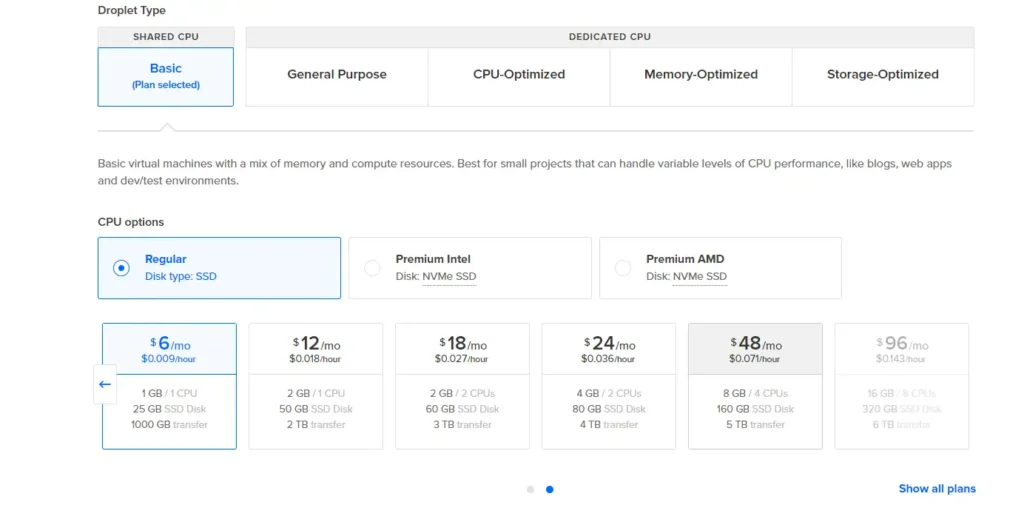
Select the region closest to you. In my case it is India-Bangalore. For the OS we are choosing Ubuntu 22.04 LTS x64. For Droplet Size we are choosing Shared CPU Basic > Regular 6$ Droplet
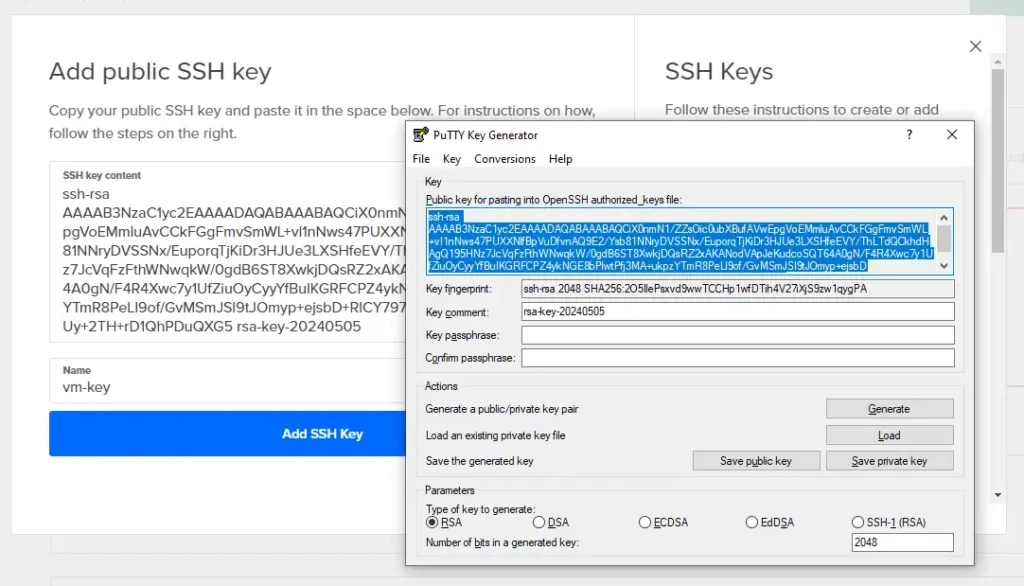
Now we scroll down a little until we see Choose Authentication Method. This is where you will be inputting your freshly generated SSH key. Click on New SSH Key, Now open your Puttygen and copy paste your key field as per the image.
Click add ssh key. Do not close your Puttygen yet. We have to save private key from it. In order to do so click on Save Private key > It will show you a warning that you are saving it without a passphrase. If you click no it will ask you to save it using a password and if you click on yes it will save without a password. You should always remember this password if you choose this option because without it your private key won’t be of any use. Save it somewhere on your system, Make a secure backup of it too.
Now back to Digital Ocean window. After saving your Digitalocean key we move forward with create droplet. Wait a few seconds for your droplet to be created. You should see something like this post completion.

How to Connect to your Cloud Server ?
Next we need to establish a SSH connection. First copy the IP address shown in your digitalocean droplet from the above image example the IP is 134.209.157.129 and paste it into the Hostname Field of putty. In order to establish ssh open start and this type just type putty, not putty gen. Open Putty and from left Menu navigate to Connection > SSH > Auth > Credentials.
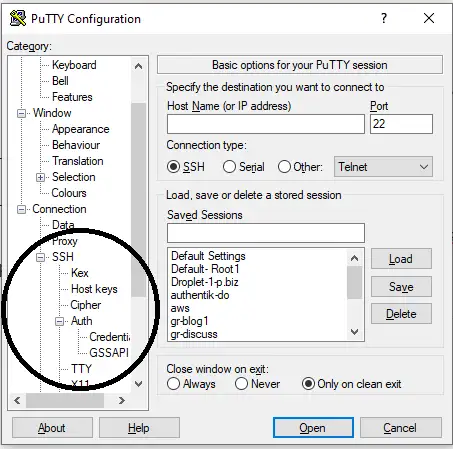
Now click on first browse option to select the Private key you stored earlier and click on open. Now Putty will be establishing a SSH connection, An initial warning will be displayed, Click accept and the terminal will prompt “login as” for which you type “root” and press enter.
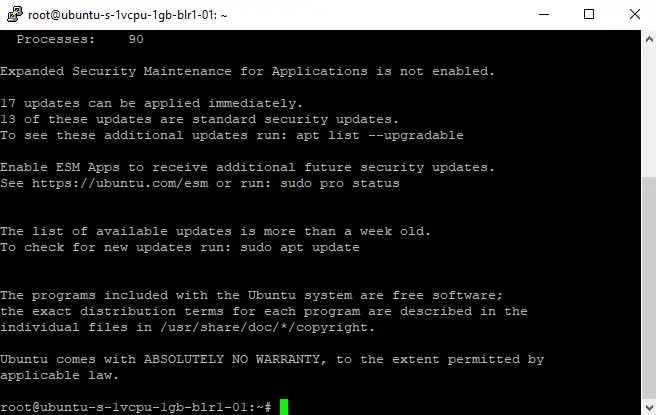
If you see this window then congratulations you have successfully created a VM on Digitalocean and established a secure SSH connection to the server.
Stay tuned for more blogs where we will learn how to deploy your website using LAMP (Linux Apache Mysql and PHP) stack, How to further secure your Cloud VM by using native firewalls, buying and using a domain name to show content from the VM you just deployed and much more. We will also be releasing youtube videos on these topics. Stay Tuned.
Do comment for any doubts or questions you might have. We will also explore with Linode, AWS, GCP, Azure and Hetzner,